- from the menu in the main Outlook window select Tools > Rules and Alerts...
- Left click on New Rule
- Click on Start from a blank rule
- Make sure Check messages when they arrive is selected
- Click Next
- Check Where my name is in the To box under Select condition(s)
- Alternatively, you can leave all boxes unchecked to make the auto-responder reply to all incoming mail.
- Click Next
- Check reply using a specific template under Select action(s)
- Click on a specific template under Edit the rule description
- Select User Templates in File System under Look In:
- Highlight the template created before
- Click Open
- Click Next
- Check Except if it is an Out of Office message under Select exception(s)
- Click Next
- Type the desired name for your auto-responding filter under Specify a name for this rule
- Optionally, check Create this rule on all accounts
- Click Finish
- Click OK
Thursday, May 31, 2007
Creating an Auto Responder - In 20 Steps
A curious email that says you have got someones email and will get back to them as soon as possible, is a great personal touch. You can do this in Outlook by following the steps below.
Wednesday, May 30, 2007
Yahoo Mail - Customize
 The second column of the Yahoo email options page give you six setting you can do with your Yahoo mail.
Mail Addresses - By left clicking on the link in the first section you can change who your Yahoo address is displayed. You can even set up your Yahoo email to be received in Outlook or other email client.
Filters - Filters is not only for sorting out spam email, but it also allows you sort your email by incoming subject or individual.
General Preferences - Here you can set your outgoing mail display and how your web browser displays you email.
Signature - This is where you can customize your email signature.
Vacation Response - Ever want to let people who email you that your won't be emailing them back for a while, because you are on vacation. Yahoo has this feature for you.
Announce Email Address - If you switch to Yahoo email you can send out announcements of your new email address. Yahoo helps you by left clicking on the bottom link.
Announce Email Address - If you switch to Yahoo email you can send out announcements of your new email address. Yahoo helps you by left clicking on the bottom link.
Tuesday, May 29, 2007
Yahoo Mail Spam Filter
After left clicking the Options link, you will be taken to another window. The left column give you filtering options on your Yahoo mail.
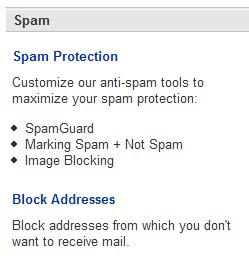 The top options allows you to set up your spam filtering options. By left clicking on Spam Protection will open a box that allows you decide what is spam and image blocking.
Block Addresses is just what it says. You can block email from an individual email address. This is another good way of blocking unwanted email.
Monday, May 28, 2007
Yahoo Mail Options
 Yahoo mail is the leading free web based email service. It is followed by Hotmail and then all the others. Being free you have to put up with advertising. Eventually a lot of people put up with the advertising to have the free email service.
I know Yahoo mail is free, but Yahoo gives several options Yahoo gives you to customize you email. They also give you a spam filter that works quite well.
Accessing these options is done from the email overview window. On the right side double left click on the link that reads options.
Sunday, May 27, 2007
Cursor, Cursor, Cursor
The cursor is the that moves on your monitor, when you move your mouse. Unless you have your cursor totally customized, each time it changes shapes, means something different.
 The arrow is pointing objects (or icons) waiting for you to left click. Most of the time a cursor will stay in the shape of an arrow.
 When the cursor turns to a finger pointing, it usually means that you can left or right click on a link in a web page or a program.
 When you move the cursor in to an are that your can type text the cursor turns into a capital i. After you move away, the cursor is changes into a blinking vertical line. This means that your computer is ready for you to start typing in that text area.
Saturday, May 26, 2007
Windows Key + Break = System Properties
Every person that sits behind a computer has a little different way of performing a task. That is what I like about Windows is that they give several ways to do the same thing.
Hold down the Windows Key then press the Pause|Break key will bring up the System Properties dialog box.

Hold down the Windows Key then press the Pause|Break key will bring up the System Properties dialog box.

Thursday, May 24, 2007
Creating Custom Signature - Part 2
- Left click the Signatures button at the bottom on the dialog.
- In the Create Signature dialog, click the New button.
- Type a name for your new signature.
- Click the Next > button.Right-click in the Signature text box.
- Select Insert Image from the pop-up menu.
- In the Picture dialog, click the Browse button.
- In the Picture files dialog, navigate to the image file you would like to use.
- Highlight the image file and click Open.
- In the Picture dialog, click the OK button. Your image will appear.
- Add any other text as needed.
- Click the Finish button.
- Click the OK button.


Subscribe to:
Posts (Atom)


